Customize Fields
Church Windows comes with quite a few fields already defined for tracking plenty of information about everyone in The People File. You may also create additional Individual Record Fields to track whatever information you'd like to track and you may also Re-label Permanent Fields. Fields can be created in any for the Categories (Members, Visitors, etc.). Fields can be visible in every Family Categories or only in selected ones. From the Customize Fields screen, you decide which fields will be visible and the order of the fields for each Category, unless you check the box to use the same fields for all Categories.
To access the Customize Fields screen:
- From The Initial Portal of Church Windows choose Membership and either:
- Click the People button
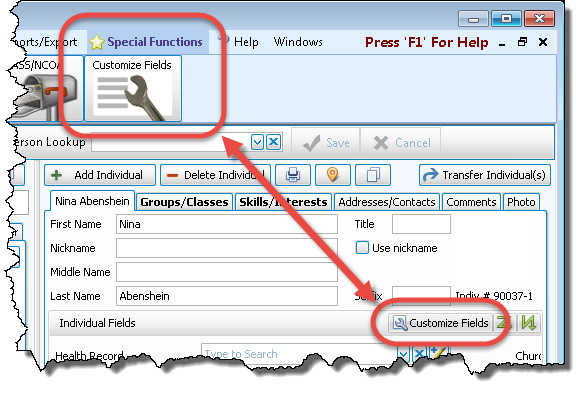
- Click Special Functions in the Button Bar at the top of the screen

OR
- Click the People button
- Then click the Customize Fields button:
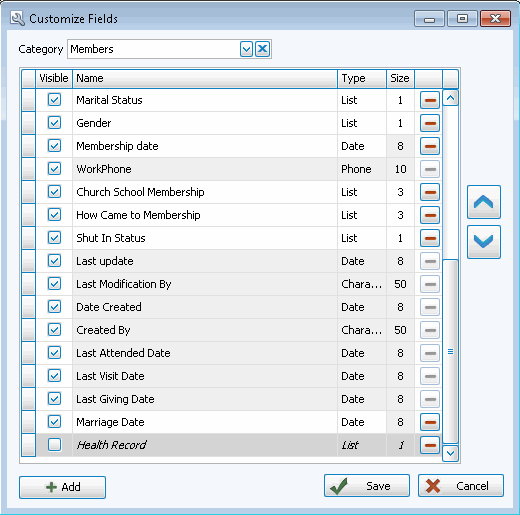
- The Customize Fields screen will appear listing all of the fields in Individual Record Fields for the selected Family Categoriesin the dropdown at the top of the screen:
 Add a Field
- Click the + Add button in the bottom left.
- This will add a new row where you will first enter the Name of your new field:

- Press TAB or click to advance to the field Type box.
- Click the
 dropdown button to see the options for Field Types. Choose the applicable field type to select it:
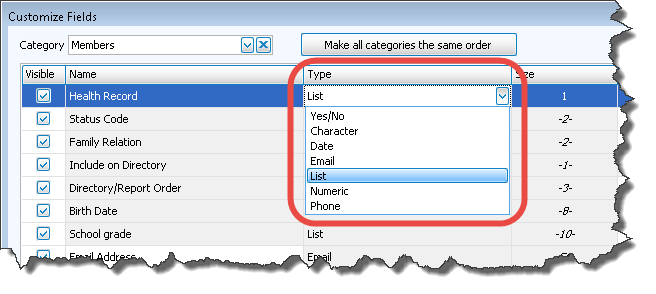
- Press TAB to advance to the Size column to define field length. (If you have selected a Yes/No, Phone or Date field from the Field Types, then the field length will default to the correct length for that type.)
- Enter the number of characters you would like this field to hold. (1-50)
- Click OK
- If you would like to enter more fields, continue in this manner. If you are finished adding fields, click Save.
Note:
A field created on the Member Category will default to being visible on the Member records under the Individual Record Fields. If you have created a field in Members that you would also like to use in Visitors or another Category, select that Category from the dropdown, highlight the name of the field (which will be at the bottom of the list), and put a checkmark  in the Visible column.
Edit a Field
- In the Name column, highlight the name of the field you would like to edit.
- Make any desired changes to the field Name, Type, or Size.
- When you change Field Types, a warning and confirmation box will appear on the screen, confirming that you would like to make that change:
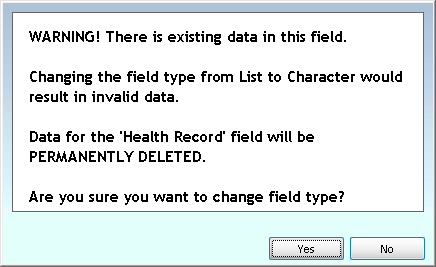
- Click Yes to edit that field type deleting the existing data, or click No to cancel the changes keeping the current data.
Reorder Fields
There are two ways to change the order in which the Individual fields appear on the screen:
- From the Customize Fields screen:
- The order that fields appear in this list is the order that they appear on the Individual record.
- To change a field's position on the screen, first click the field you would like to move.
- Then move it up or down in this list using the
 up and/or down arrow buttons on the right until the field appears where you would like it.
 - Once the field appears where you would like it, either continue on with your work on this screen, click the Family Categories dropdown and choose a different Category to edit, or click OK to make your changes final and return to the People screen.
- Right-Click, then Drag-and-Drop:
- On the Name Tab of The Individual Record, right-click anywhere to reveal the Customize Layout button:

- Click that button, which will then enable the ability to rearrange the fields:
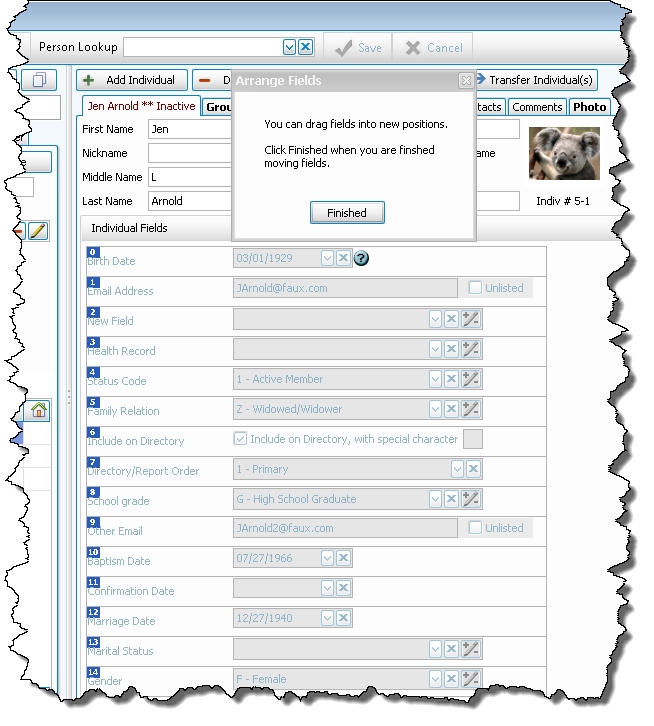
- As the Arrange Fields pop-up message indicates, you simply need to drag the fields into the desired positions.
- When you are satisfied with the arrangement, click Finished.
OR
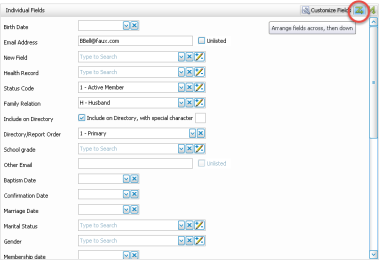
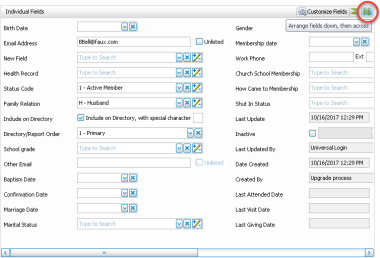
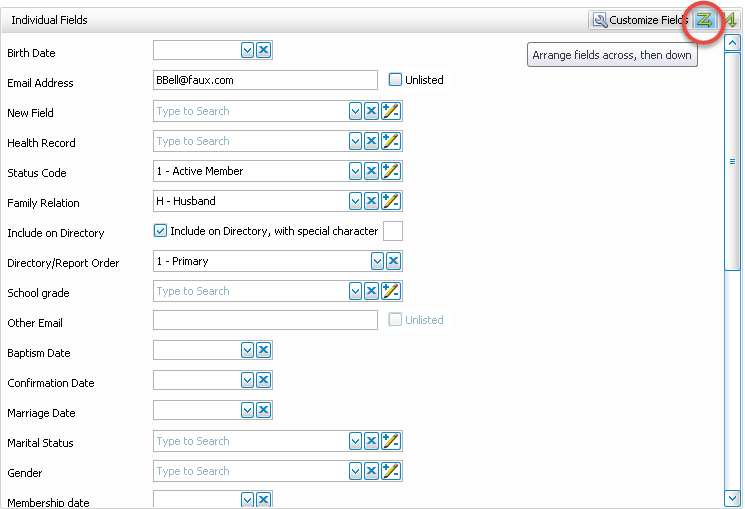
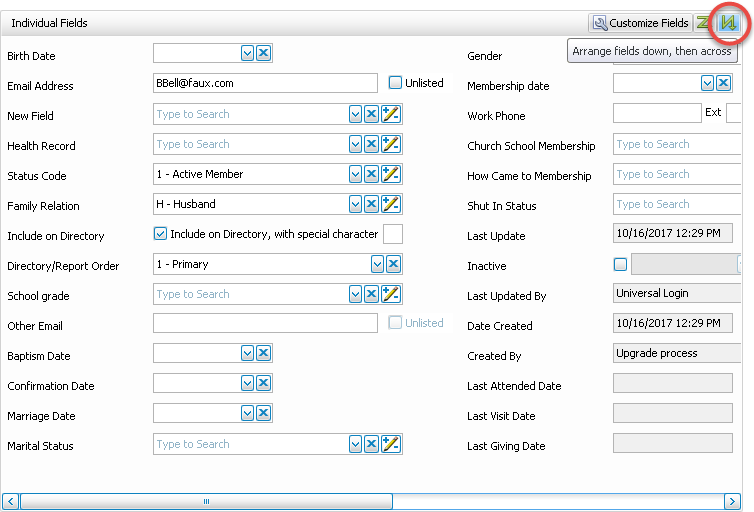
Additionally, the fields can be arranged on the screen either "across and then down" (scrolling up and down the record) or "down and then across" (scrolling left and right on the record) by using the two buttons with green zig-zags (next to the Customize Fields button): 
Across, then Down:
Down, then Across
Hide a Field
- In the Name column , highlight the name of the field you would like to hide.
- Uncheck the box in the Visible column.
- That field will then move to the bottom of the list of fields, the background will turn darker gray, and the text will be italicized for clarity:
Important!
If you choose to hide the “Include on Directory” field for every Family Categories, the Directory function will not be available in Reports / Directory / Exports. The Directory/Report Order field may not be deleted or hidden.
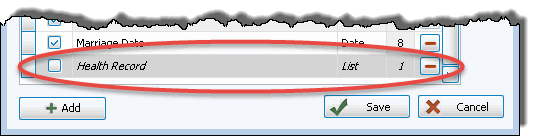
Delete a Field
- In the Name column, highlight the name of the field you would like to delete.
- Click the
 Delete button at the far right.
 - A confirmation box will appear on the screen, confirming that you would like to delete that field from all records:
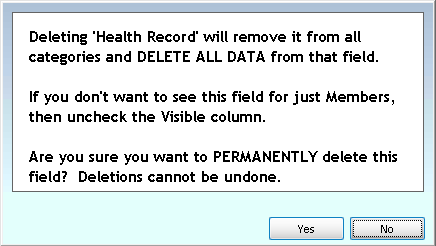
- Click Yes to delete that field, or click No to cancel the deletion.
Re-label Permanent Fields
In The People File, some of the fields can be renamed in Membership Settings. These fields are City, State, Zip Code, Carrier Route, Geographic Area, Groups / Classes, and Skills / Interests.
For example, you may wish to change Geographic Area to Neighborhood, Skills / Interests to Spiritual Gifts, etc.
If you are in Canada, to change the label on the State field to Province and the Zip Code field to Postal Code, it is best if you go to Administration, then choose System Information, and select "Canada" in the country box. This will automatically relabel those fields and adjust the appropriate Canada Settings for you.
- From The Initial Portal of Church Windows choose Membership
- Choose Special Functions in the Button Bar at the top of the screen:
- Choose Membership Settings
- Click the Relabel Fields tab:
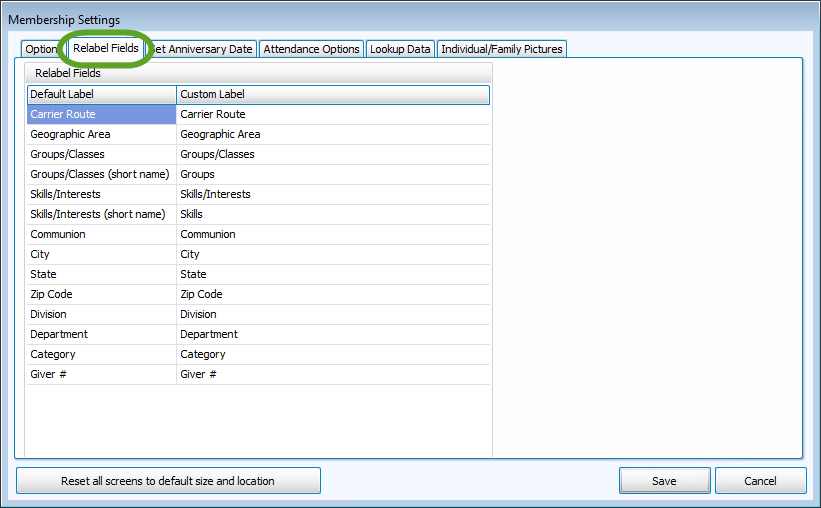
To change these field names:
- In the column titled Custom Label, click the field name that you would like to change; it will be highlighted.
- Begin typing the new field name or delete the name that is in the column using the Delete or Backspace keys.
- Enter the new name.
- The changes will be saved when you move the cursor to another area of the screen or when you click Save.
These are global changes which will affect all Family Categories.
Note:
Church Windows comes with several standard Individual Record Fields already entered, such as Include on Directory, Directory/Report Order, Family Relation, Birth Date, or Work Phone. For operational reasons, you may not delete or rename these fields. As a visual indicator, these fields have a pale gray background and the Delete button is grayed out to differentiate them from the fields that you are able to edit or delete.
